I don’t know about you, but this time of the year my mailbox typically fills up with a steady stream of seed catalogs. Since I typically order most of my seeds online or buy them at our local nursery, I usually give the catalogs scant attention. But this year I decided to find a purpose for them before they head for the recycling bin and came up with a pretty ingenious egg carton seed starter using images from seed catalogs. The girls were immediately on board. Actually, they were the ones who had triggered the seed starting project to begin with.
“Mommy, Mommy can we plant seeds this weekend?” the Big Naturalist pleaded with me. “Apples and pears and tomatoes and beans and peas!”
“Pleeeeease!” the Little Naturalist chimed in. “I want to do pumpkins and sunflowers!”
It was the middle of February and I knew from our experience with last year’s Nature Table that most of these crops would be way overgrown by the time we could actually transplant them to the garden and flower beds outside. But how could I deny them? Their enthusiasm was contagious.
“I want my room to become a jungle,” the Big Naturalist mused, while frantically gathering empty egg cartons from the garage.
Their initiative made me excited for a couple of reasons.
For one, it gave me a push to start thinking about the garden, which is always a last-minute, poorly planned venture on my end. Secondly, it gave me hope that I’m capable of raising budding gardeners, despite having thumbs black as charcoal myself.
The thing is, even though my garden is not the most prolific, periodically gets neglected, sometimes attracts fascinating critters (tomato horn worms, anyone?) and often suffers from deer damage, it gives me and the girls something to tinker with outside all summer.
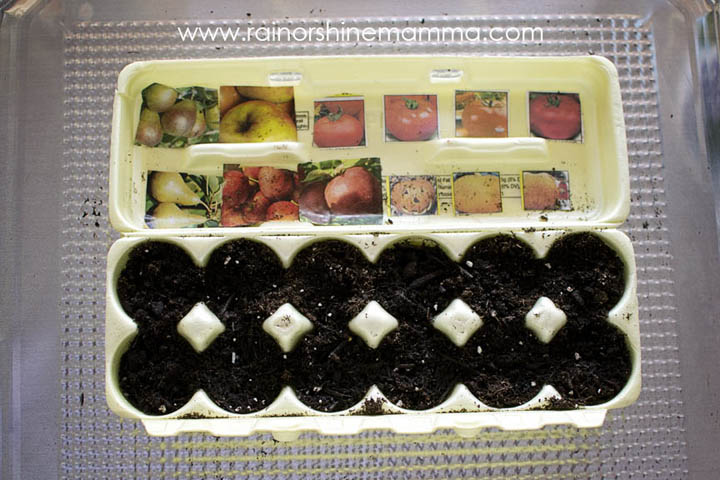
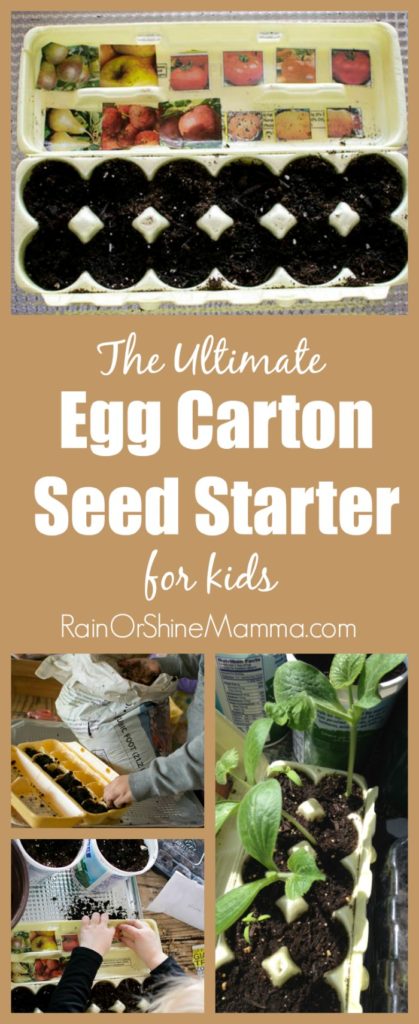
Which brings me back to the egg carton seed starters, because that’s where it all begins – planting some tiny seeds while the raised beds are still covered with snow and the gardening days still seem so far off. Not only is it a fun way to get kids involved with spring planting, these planters also give you a unique labeling system that includes a visual reminder of what has been planted!
Egg Carton Seed Starter
Materials needed:
- Egg cartons
- Potting soil
- Scissors
- Seed catalogs
- Glue
- Oven liners (to put the egg cartons on)
- Seeds
How to do it:
- Decide what to plant and get your seeds. If you haven’t yet ordered any seeds for your garden, see what you can collect from fruits and vegetables that you already have on hand. We planted both apple and pear seeds last year – unconventional, yes, but that’s what makes it fun.
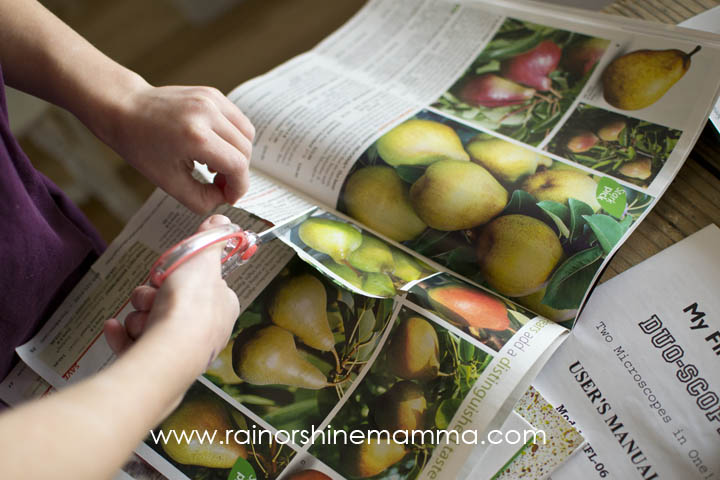
- Have your kids cut out pictures from the seed catalogs to match the seeds that you’re planting. You’ll need one picture for each slot in the egg cartons.
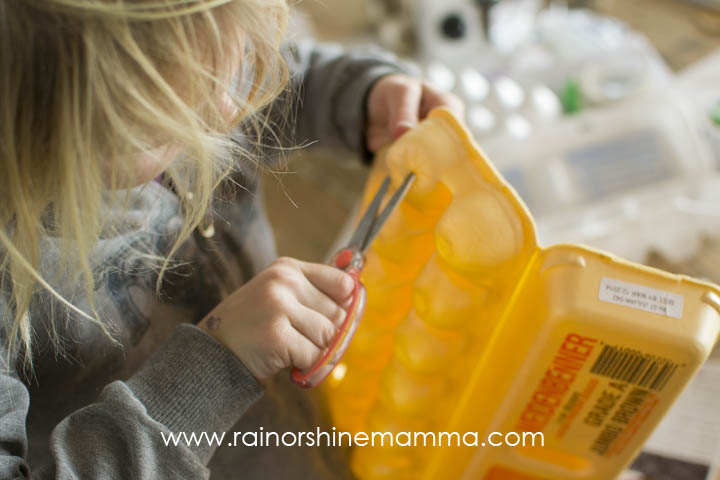
- Use the scissors to make small drainage holes on the bottom of the egg cartons.
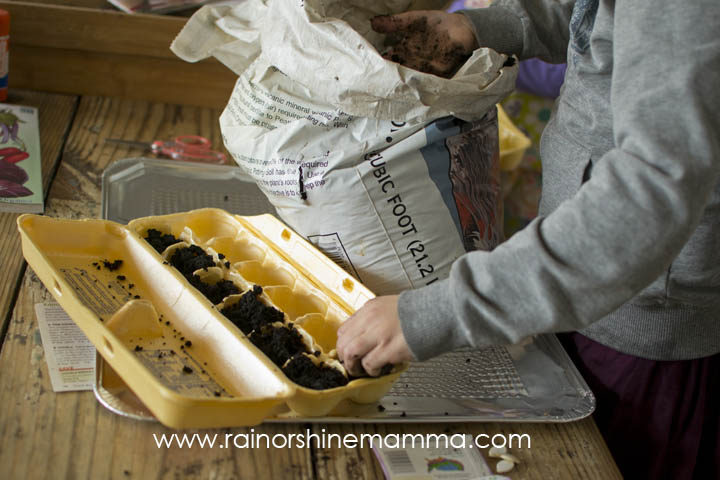
- Fill the egg cartons with potting soil and plant seeds according to the instructions on the bag.
- Glue the pictures representing each seed on the inside of the lid of the egg carton. The pictures act as a visual reminder of where the different seeds are planted.

- Put the egg cartons on the oven liners and place them in a sunny spot in your child’s room.
- Wait for room to turn into jungle!
Have you started any seeds yet? If so, what have you been planting?
Here are some more fantastic seed starting posts from my fellow bloggers:
Seed Germination for Kids from How Wee Learn
Top 10 Seed Starting Ideas from Nemcsok Farms
Create a Magic Seed Star from Carrots are Orange
DIY Seed Paper from Mommy Loves Trees
Sprouting Seed Activity from Housing a Forest


The pictures on the lid take this from fun and handy to total genius! Awesome!
I agree — pictures on the lid are total genius! We haven’t started planting anything, and it’s already March! Time to get to it…right after I start following your gardening boards on Pinterest. 🙂
~Lee
Thanks, Lee and Evelyne! I can’t wait to get my hands in the ground. Until then, the seedlings in these egg cartons will keep us busy:o)
I’ve done this before, but not with such pretty labels! Great idea! : )
Thanks, Karen:o) Tinkering with the seed catalogs add a bit of fun for the girls.
Great idea–thanks!
Glad you liked it! Thanks for stopping by.
Hi Linda,
I like your new blog look! : ) I have a few packets of seeds from my earth friendly race pack and have been procrastinating on them…. This post of yours is my catalyst to use them! Like your wonderful idea of using the images for reference and labelling. haha… apparently I’m not the only non-green fingers here. So for the fun and experiment though I wish they will survive…. ; )
Definitely go ahead and plant them! Half the time ours are a failure but we still have fun!
Could these be used as your starters and get a head start with planting before we are able to actually plant outside (usually end of May in these northern parts)? And if so, how much time in advance do we plant them indoors like this so that we can transplant in good timing? One month too much?
Yes, the idea is to use the egg cartons to get a head start on the planting while it’s still too chilly to start anything outside. When you can plant things will vary depending on what it is, since all plants are different. If you go online and check the websites of some seed distributors, they’ll usually have a little chart for each seed that tells you when you should start it indoors for an early harvest, and when it’s OK to sow it directly in the ground without starting it indoors. Hope this helps!
hun the reason most of the plants fail is after you plant the seeds they should be covered with plastic wrap and put in a warm dark place for at least a week or 2 when you see strong sprouts then remove plastic wrap and place in sun .you should plant at least 3 seeds in each hole to be shure something grown in about 4 weeks pull out all but the strongest plant and allow it to grow till planting outside …do not do drench the seeds or small tiny plants spray with a squirt bottle to keep soil damp not soaked.good luv have fun
That’s good advice, thank you!
I learned a tip several years ago. Take individual plastic soda bottles and cut the tops and bottoms off leaving the wide middle part intact. When you plant the tomato sprouts, place one of the bottles over/around the plant. Press it into the soil a bit to stabilize it. I’ve been doing this to my tomato and pepper plants for several years now. No worms! In addition, I plant marigolds often near my plants as they repel mosquitoes. Last year I bought a mosquito plant and grew it next to my back door. I had only two mosquitoes get into my home all summer. This year I plan to put one at the front door as well as the back door to my condo. My patio is loaded with pots all summer. That is how I garden and love ? it. Hope this is helpful to others.
Sounds like a great idea – thanks for the tip!
I have got 3 Orange pips growing in my living room from 2 years ago we were over in Northern Ireland for 2weeks in August for our daughters wedding and I thought they would have died but they were thriving they are about three feet tall and have plenty of flowers on and off no but no fruit but so happy they have lasted so long Our eldest daughter planted an apple pip when she was 4years old and it was up to the roof when we came to live in Cumbria sadly the people who bought the house dug it up so after 34 years the apples were falling from it never got any special treatment the children loved climbing it It was one very strong plant I have also planted tomatoes on the window ledge in the kitchen I’m going to try lemon pips and pear pips now.I don’t have any gardening experience just love the growing success
That’s so neat! I think kids really enjoy the simplicity of this type of planting, especially when they see the fruit of their labor. Thanks for sharing:)
What a fun idea for getting kids outside this May! Just wanted to let you that I featured your post on my blog if you’d like to share it. https://amysenter.com/may-pinterest-roundup/ Happy May!
Thanks, Amy! What a great roundup:)